Project Description
You are to familiarize yourself with using Ogre in C++ by making a
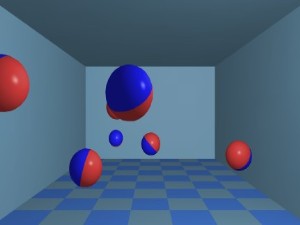
small demonstration. There will be only two objects in this, a
spherical ball inside a cubic room. The ball will start off in a
random direction and with a randomly chosen speed within some
reasonable range of your choice that will allow a nice interactive
demo. At each frame, you will move the ball in the current direction
an amount determined by its speed, which can remain constant for the
entire time the program is running. You will check to see if the ball
has hit any wall. If it does hit a wall, you will adjust its
direction to make it bounce off the wall as in a perfect elastic
collision with no loss of energy. This is therefore just a geometric
computation to change direction, no real physics simulation is
required.
You can color and light the environment in simple ways, nothing needs
to be texture mapped, but the lighting cannot just be ambient, you
should at the very least have diffuse lighting from at least one light
source that is placed so that the observer can see the shape of the
ball and the discontinuities where the walls of the room meet. The
objects are presumed opaque and three dimensional.
Getting Started
You should first take the opportunity to download and build the
Ogre platform to the machine you plan to use for most of your
development work. The source code can be found
here. I have had
good luck building this according to the instructions provided for both
the lab Linux machines and for Windows 7 using Visual Studio 2010. I
have had less luck with OSX on either Lion of Snow Leopard, so I would
advise you to avoid those platforms until I've had time to figure out
how to get the build to work. Follow the instructions to build Ogre
and the Ogre docs if you want a local copy of the documentation.
Alternatively, you can find documentation
here.
You should pay particular attention to the
Ogre Wiki, and within
that to the
Tutorials
to help you get started.
Platform specific instructions
Lab Machines
Building and Installing OGRE
Since Ogre and OIS (the input system library nearly always used with
Ogre) are already installed on the lab machines, you don't have to
install it. By lab machines, we mean the 64-bit linux machines with
names from Kingdom of Loathing (run cshosts kol64 to
see the names of these machines) or from nethack (run
cshosts nethack64 to get these names) in the ENS basement lab. We
don't support the game software on any other public machines, and you
probably wouldn't want to run it on those slow beasties anyway.
Building your Application with your Ogre Installation
Start by making yourself a directory, we'll call it
appdirectory, in which to put all your stuff. It's better not
to put this in installdirectory, otherwise put it where you
like. Now go here
and download and extract the four files (BaseApplication.cpp,
BaseApplication.h, TutorialApplication.cpp,
TutorialApplication.h) in "Tutorial Framework (Linux
Line-endings)" into appdirectory. Then extract these tools into appdirectory.
This should add four more files, buildit, makeit,
configure.ac, and Makefile.am to
appdirectory. Finally, extract these resources into appdirectory. This should add two .cfg files and a
media directory.
You will generally need to edit Makefile.am. In the second line,
change the list of header files to be the list of header files you are
using in your application instead of BaseApplication.h and
TutorialApplication.h. In the next line, change the name of
the executable file you want created from OgreApp to whatever
you want to use. If you change this, you will also need to make
corresponding changes to the name at the beginning of the next 4
lines, e.g. OgreApp_CPPFLAGS becomes
YourProgramName_CPPFLAGS, etc. Finally, in the line
that originally was OgreApp_SOURCES= BaseApplication.cpp
TutorialApplication.cpp, change the list of .cpp files
to the names of the .cpp files you want to compile for this
program.
Make sure that you set the protections such that both buildit and
makeit are executable (if they aren't already). You can do this using
the command chmod u+x buildit makeit. Then just give the
command ./buildit and you should see a whole bunch of new
files in appdirectory, one of which is called called
OgreApp or whatever name you changed it to. Execute
that file and if everything worked right you'll get an empty
Ogre window that you can use as the start of your own application
development.
Windows with Visual Studio
For this platform, you can just follow the instructions here
and things should work as described. I've used both the Ogre SDK and
built Ogre from source, and I've built the application project
manually with Visual Studio 10, not with the Ogre Application Wizard,
and it worked fine. Note that when you want to run your executable,
there will be a copy in the directory where the Ogre libraries have
been built. Run that one so it can find the dll's it needs.
Mac OSX
Still trying to get this to build reliably on the Mac. If you have a
Mac laptop (like me), start your assignment on the lab machines and
stay tuned.
Notes
You might prefer to use the MinimalOgre starting code instead of the
Tutorial Framework as your initial application. It does the same
work, but all in one class instead of two. Read the pros and cons in
the tutorial about the two different starting points, the suggestion
there is that MinimalOgre is a better starting point for your project,
but not as good as the Framework for tutorial purposes. If you do
this, you'll have to modify the OgreApp_SOURCES definition in
Makefile.am so that it has the correct list of your source
files in it before you build.
You can make the code smaller by using TinyOgre instead, this
is a pretty minimal starting point, for instance it drops the use of
the OIS library for input. And you can get rid of the need to
use .cfg files as shown in LowLevelOgre by hard coding
these definitions. Look at all of this as discussed in the Ogre
Tutorial to understand more about options for starting a project with
Ogre.
There's a lot of useful media (meshes, textures, shaders, etc.) in in
the media subdirectory of the Ogre distribution. These are also
available here as a gzipped tar file
if you aren't using an Ogre distribution (as on the lab machines).
There are other tutorials in the wiki that show you how to load and
use these resources in Ogre.
If you change the code in any of the tutorial files and you want to
recompile, you can do this just by giving the ./makeit
command without redoing ./buildit. If you want to add more
files, put them in your directory and add the .cpp files to
the list in Makefile.am, then rebuild using
./buildit at least once before dropping back to
./makeit.
What to turn in
Whatever machine you develop your application on, you will need to
turn it in on the lab machines, so if you didn't develop it there, you
will need to port it and build a runnable version there.
Make sure you leave some time for
this in your planning. You will turn in the following:
- An executable file that can be run out of the box by us on the
linux lab machines. This should be built against the standard
linux installation of Ogre as described below.
- A README text file that tells us both what exactly are the steps
involved in building the program from what you've turned in.
- A project description text file that tells us what
functionality you've implemented, any other interesting
features of the program (e.g. it's really fast because I did
this clever thing), what software it relies on that you
didn't write, issues you've encountered if you have
unresolved problems, and how to use the program once it's built
(trivial for the base version of this assignment, but
critical as we go forward or if you've done extra credit work).
- A source tree of your project, including any resources needed
that are not already installed on the linux lab machines. To
turn in the main project, first clean your development area
so that all intermediate files and object files are
removed. Do not remove the executable of your project. Make
sure that the necessary .cfg files are there, along with all
the media you're using in a subdirectory. Put the README and
project description files here too. Then, go to the
parent directory (we'll call it sourcetreedir) and
use the following command to submit your entire project tree:
turnin --submit agrippa assignment1 sourcetreedir
Note that this command turns in everything you need to submit if
you followed these instructions.
Porting your Application to the Standard Ogre Lab Installation
Regardless of whether your built you application on Windows or on your
own installation of Ogre on the lab machines, you'll need to configure
it to build on the standard Ogre installation in the lab before you
turn it in. To do this, either start with the appdirectory you
created earlier, or make one if you're porting from Windows. Make
sure you have all your source code (.cpp and .h
files) in this directory. Make sure you have any media you are using
in a subdirectory. Also make sure you have plugins.cfg and
resources.cfg files in this directory if you are using those (as is
done in the tutorial startup code). Finally, download the
maketools.tar.gz file linked above in the section on building
your application on linux and extract these files
into this directory. Then do the following.
- Remove the second and third lines (those starting with export)
from both buildit and makeit.
- Edit Makefile.am so that the noinst_HEADERS
line has a list of your .h files, the bin_PROGRAMS
line has the name you want to use for your executable after the "="
sign, and the four lines following that one have OgreApp at
the beginning of each line replaced by this same executable name.
Finally, make sure the fourth line starting with
executablename_SOURCES has a list of your
.cpp files after the "=" sign.
- Edit plugins.cfg so that
PluginFolder=/usr/local/lib/OGRE. Make sure the only plugins
you define are: RenderSystem_GL, Plugin_ParticleFX,
Plugin_BSPSceneManager, Plugin_PCZScenenMnager,
Plugin_OctreeZone, and Plugin_OctreeSceneManager. Unless
you are doing something very fancy in your code, all but the first of
these are optional.
- Edit resources.cfg so that the all the references are to
the media directory you've created, presumably as a subdirectory of
your appdirectory. You will certainly not need all of the ones
that are distributed for the Ogre samples, and resources.cfg
only needs to refer to those that you are actually going to use. If
you're using the tutorial code, that probably does include
SdkTrays.zip but not thumbnails (even though it
lists that as essential). The only other ones you are likely to be
using are the materials directories (okay, maybe not the
nvidia one) if you got fancy and started using textures and stuff on
your objects, and the models directory (if you got the sphere mesh
from there). You don't need to reference the others.
After doing this, just run ./buildit and you should get a build
that runs using the installed version of Ogre. Now you're ready to turn
things in.
How to use turnin
Instructions for using
turnin are
here and by doing
"man turnin" on the
linux lab machines. Note that to use this or do any of the other work
on the linux lab machines, you'll need a UTCS department account. If
you're in our program, you should already have one. If you're in this
class and don't have one, you're qualified to get one. To do so, go
here. Make sure to
do this well before the assignment deadline.
Extra credit
Here is a list of suggestions for extending the program. Note that since
the assignments will build on each other, many of these things will
constitute head starts on what you'll have to do later. We'll giving you
some extra credit for being ahead of schedule. How much depends on how much
you've done. Don't expect the extra credit make up for not doing the basic
requirements, though. If those aren't done, no extra credit will be given.
And after the first two extras, things get much more involved, so concentrate
on those first.
- Make it look fancier. Texture map the ball/walls. Have things
change appearance when a collision occurs. Use fancier
lighting with highlights, more light sources, etc.
- Add a camera that can be moved around with keyboard and mouse
controls.
- Put more balls or other objects in the environment, and check collisions with them. If you do this, make sure to obey real physical conservation laws. You may (but probably won't) want to use the bullet physics
package for this, but that's a huge step forward.
- Add even more physics, such as objects that add energy to the
system when they're hit, or things that blow up when they're
hit. That's always fun.
- Add sound effects that are synchronized with the impact of the ball
against the walls. To do this, you'll need to use a sound package in
addition to Ogre. We plan to use SDL for sound and various other
things.
- Add an interactive user interface with some controls. You can do
this using Ogre as described in the tutorials, or you can use a GUI
package of your choice.
- Keep score, and display the score. Give the person running the
program some points when certain things happen. Of course,
this doesn't make much sense if you don't have a gui in there
and enough complexity to define some kinds of goals that can
have points associated with them when reached.
And if you do all of this, you've already made a simple game. No, we
don't expect that, you'll be weeks ahead of schedule, concentrate on
doing the required stuff first.