Final Project
CS 384G: Computer Graphics, Spring 2010
Synthesizing 3D Textures
| Mrinal Deo mrnial.deo [at] gmail [dot] com |
Michael Gerbush mgerbush [at] cs [dot] utexas [dot] edu |
Harsh Shah harsh [at] cs [dot] utexas [dot] edu |
 |
 |
 |
I. Introduction
In our final project we proposed to add solid texture mapping to our ray tracer. We successfully added 2D textures, bump mapped textures, solid textures by stacking and attempted to implement an advanced technique for 3D texture synthesis which is described under section 3. We discuss issues about 2D textures and benefits of solid texturing in section 2. We also discuss our approach, modules we implemented as steps towards the final goal and our results in section 3. We finally talk about some issues and future work for this project in section 4 and 5.
II. Motivation
We saw 2D textures and an introduction to 3D/solid textures in the course material for cs384g. Textures add more life(reality) to the scene objects. 2D texture mapping techniques are simple to implement for primary objects where parameterization is easy. However, these simple techniques face the following issues when rendering polymesh objects -
- No Global Perspective
- Parameterization is difficult
- Warping
- Natural Textures
- Subsurface Scattering
- Breaking Objects
For solid textures, we have attempted to implement the 3D texture synthesis technique proposed by Kopf, et al. [1]. We chose this method because it is applicable to a wide array of textures and it produces high quality 3D textures. Here are examples from Kopf et al. of 3D texture mapping using textures synthesized from 2D exemplars:

Examples of 3D textures synthesized using the methods of Kopf et al. Each model was textured from a solid texture created from the 2D exemplar. The middle texture was rendered with the brown texture pixels as transparent to reveal the complex 3D structure.
III. Approach
2D Texture Mapping
Before we could began using 3D texture mapping, we began by implementing simple 2D texture maps to gain some experience with texture mapping principles. In order to do this we needed implemented a bilinear interpolation algorithm to calculate continuous texture values. As a result we were able to texture simple objects, such as squares and cubes.

Simple scene rendered using 2D texture mapping for the checkerboard.
In addition, we added the ability to specify a 2D bump map for simple objects.
Simple scene using a 2D bump map on the surface of the cube. There is no actual texture on the cube, we used a stone texture as a bump map, to create the cobblestone effect.
3D Texture Mapping
After implementing 2D textures and bump mapping, we moved on to texturing with solid textures. Before we could being synthesizing 3D textures we had to make sure that we could paramterize solids in 3D space and actually map a solid texture to a 2D surface. This meant devising a simple parametrization strategy from object space to 3D texture space. To accomplish this we map the rectangular bounding box of an object to our cubic 3D texture by scaling it.
This straightforward method of 3D parameterization can result in uneven scaling in each direction. One alternative parameterization is take the largest dimension of the bounding box and create a cube of with this size. However, this raises the additional issue of choosing where to place the object in this new parameter space that is larger than the object's bounding box. We chose to use the more straightforward parameterization. Regardless of our choice, these simple parametrization techniques are one of the advantages of using solid textures. Once we decided on the parameter space, we had to implement trilinear interpolation to guarantee continuous texture points in 3D space.
With our solid texturing implemented, we tested our results by creating 3D textures from 2D textures using straightforward techniques. One simple way to create 3D textures was by simply stacking a 2D texture on top of itself in 3D space, essentially ignoring an object's third coordinate in texture space.
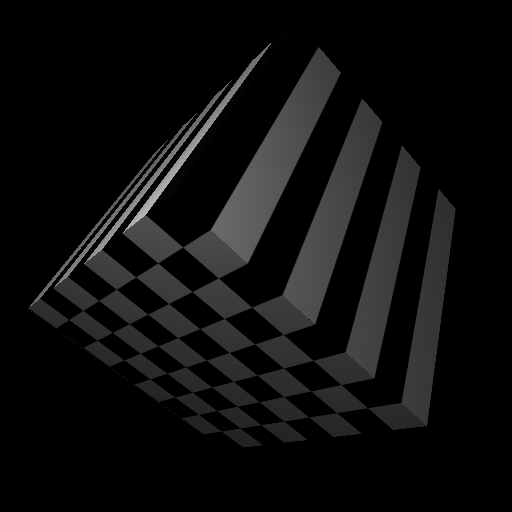
Illustration of our 3D texture mapping. Here we toss out the third parameter coordinate. This creates a solid texture by stacking the 2D checkerboard in the cube's bounding box space.
In addition to simple stacking, we also implemented axis-aligned 2D texture stacking, which we refer to as Gift Wrapping. The axis-aligned texture stacks required transforming an object's bounding box to the global origin before finding the solid texture paramterization.

Illustration of our 3D texture mapping using the Gift Wrapping technique.
3D Texture Framework
Once our solid texture parametrization was in place we needed to begin synthesizing 3D textures from 2D exemplars. To accomplish this we needed to develop a framework in our ray tracer for reading in 3D textures and for storing them. This included adding 3D maps to our parser and adding some way of saving textures, since they are extremely expensive to generate. To add a 3D texture from a 2D bitmap, add the following code to the .ray scene file:
diffuse = map3D( "filename.bmp" );
To save synthesized 3D texutres, we write a single bitmap image for each depth coordinate. This does incur a large space overhead, however, it allows us to easily analyze cross sections of the 3D texture, without taking the time to write an involved volume viewer like the one implemented by [1]. Additionally, we can use any existing tools we have for working with standard bitmap files.
Synthesis Algorithm
With the 3D synthesis framework in place, we had to implement the actual synthesis algorithm. The algorithm consists of two parts, a search phase and an optimization phase. We begin with a 3D volume texture, filled with random pixels from the 2D texture. The ultimate goal is to improve the randomized 3D texture over a number of iterations, until any axis aligned cross section of the texture matches a 2D texture in the original texture map. To achieve this we consider three axis-aligned neighborhoods at each volume pixel (voxel).

For each voxel we consider three axis-aligned neighborhoods. We search for the closest match to each neighborhood in the 2D texture. We refer to the best match in the 2D texture as an exemplar.
During the search phase, the goal is to identify the three neighboroods (exemplars) in the 2D texture that best match the three axis-aligned neighborhoods at each volume pixel. To achieve this we try to find the exemplar from the 2D texture that minimizes an energy function taken over the neighborhood. The energy function is essentially the L2 over each pixel in the two neighborhoods.

The energy function that is minimized during the search phase, where sv,i is the neighborhood aligned with axis i at voxel v and ev,i is the matching exemplar from the 2D texture. Here ||...|| represents the L2 norm and r is a constant used for numerical stability.
Once the three exemplars that best match the neighborhoods at each voxel have been found, we must update each voxel in our solid texture. To update each texture, we take a weighted average over each of the three exemplars. The weights are calculated to minimize the distance function, as well as a simple Gaussian blur. Each voxel is then updated with the resulting average.

The weighted average used to update each voxel, where sv is the voxel to be updated, eu,i,v are the exemplar pixels found in the search phase, and ωu,i,v are the weigths calculated in the search phase.
IV. Issues
While implementing 3D solid textures we were faced with the following obstacles/issues -
- Time Limitation
The basic search and optimize algorithm is of order O(n^7). According to our approximation, with a 128x128 input bitmap, the algorithm would have taken about 6 days for one iteration with a window size as small as 9x9. - Space Limitation
In order to save the generated 3D texture, we require a 3D array of RGB. This memory required coupled with memory for other variables and temporary data structures used in the algorithm is extremely high. In case of 256x256 bitmap, the machine we were running our synthesis ran out of memory and generated a bad_alloc Error. As a result we decided to use 32x32 pixel bitmaps, which also solved the time limitation issue. A single iteration of our synthesis algorithm took 6 mins for a 32x32 pixel input texture. - Improper Weighing The couple of weighing systems we used in the optimization phase were not suited/well designed for this system. It made our texture to be washed out to a uniform color for more than 1 iteration. We were unable to find the right weighing system for this algorithm in the limited time of the project.

The original 2D animal skin texture.
 |
 |
 |
 |
||
|
These three 2D textures represent cross sections of a synthesized 3D texture. You can see that while there is some clustering that resembles the spots in the original texture, the optimization phase has blurred the overall texture. The resulting texture on the dragon resembles the animal skin but it is washed out. |
||
V. Future Work
The following are ideas that were mentioned in the paper by Kopf et al. These could be implemented as future work in order to improve the results we have and achieve similar results as in the paper.
- Mean Shift Algortihm
- Histogram Matching
VI. Additional Images

Square rendered with a 2D texture.

The floor is rendered with a stacked skin texture.

Shell rendered with a checkerboard texture using the Gift Wrapping technique.

Sierpinski's Gasket rendered with the 3D wooden texture.

A chess piece rendered with the 3D wooden texture.

Dragon rendered with the 3D wooden texture.
Dragon rendered with the 3D animal skin texture.
References
[1] J. Kopf, Chi-Wing Fu, D. Cohen-Or, O. Deussen, D. Lischinski, and Tien-Tsin Wong. Solid Texture Synthesis from 2D Exemplars. SIGGRAPH Proceedings, 2007, pp. 2:1-2:9.