Creating a jar File in Eclipse
These instructions describe how to create a jar file in Eclipse.
1. Open the project than contains the files you want to include in the jar.
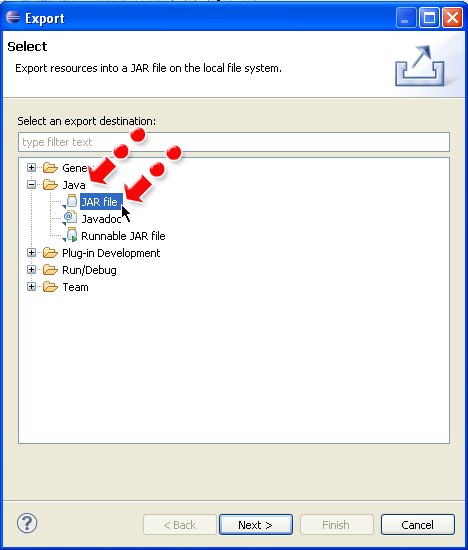
2. On the menus at the top select File then Export.
3. In the window that pops up expand the Java option and select Jar
4. Click the Next > button at the bottom of the window.
5. In the next window you must make the changes shown below: (The filename may be different than A6.jar depending on your assignment requirements.)
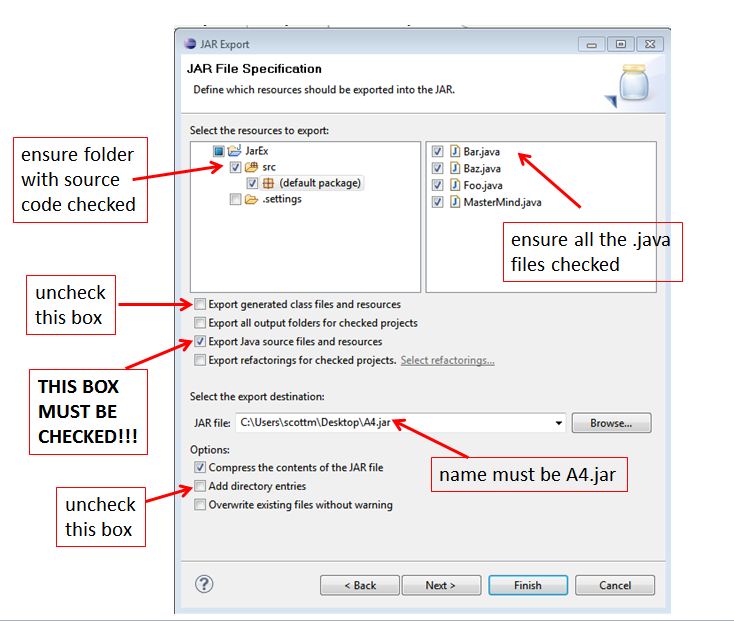
6. Files other than .java files can be added to the jar. To add a file to an Eclipse project simply drag and drop it into the project folder. It will then be available to add to the jar.
7. Click the Finish button to create the jar.
8. VERIFY YOU CREATED THE JAR FILE CORRECTLY. To check that the jar was created correctly with the source code and any other files, create a new Eclipse project. Then go to the menu option File -> Import. In the window that pops up expand the General option and select Archive File. In the Import window that pops up press the Browse... button. Browse to the location of the jar you just created and select it. After the import is complete you should be able to run your program from that new project with no problems. You can also view the contents of the jar with most compression programs such as 7zip. Verify the contents!