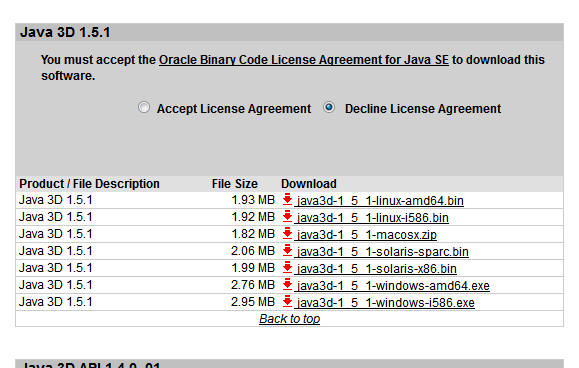
Download Java3D.
Visit this page to download
the Java3D library for your system.
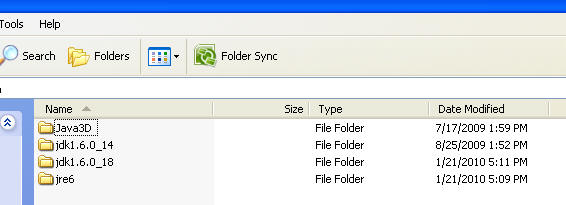
The download for Windows includes an installer. I found it
easiest to install the Java3D files and directories in my Java folder, the
same one that contains the download for standard java, jdk1.6.0_18 in my case.
After running the installer:
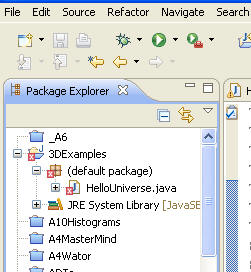
Start Eclipse. You can either create a new project for your
Java3D code or use a preexisting project. I will create a new project named
3DExamples
Download HelloUniverse.java and add it the project from step
3.
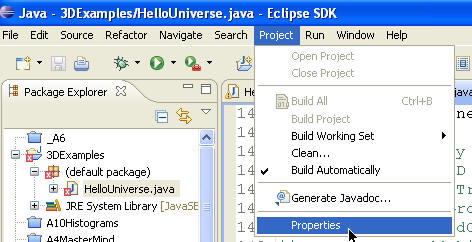
HelloUniverse.java has a lot of syntax errors because it refers to a number of
non standard classes in Java3D. We need to tell the project where to look for
these classes.
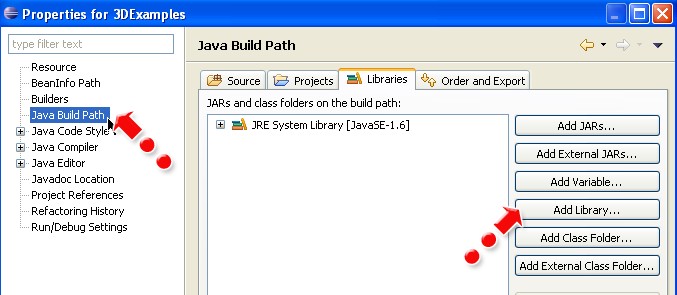
In the Eclipse menu, select Project -> Properties
In the window that pops up select Java Build Path and
then click the Add Library... button.
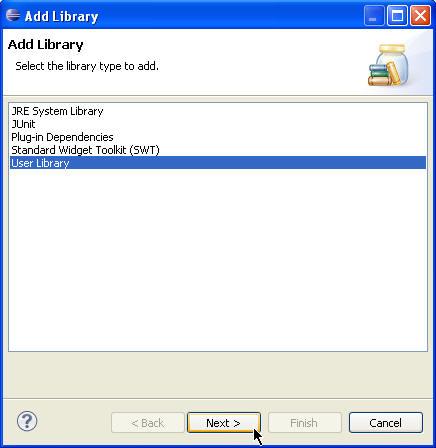
In the next window select User Library and click the
Next button.
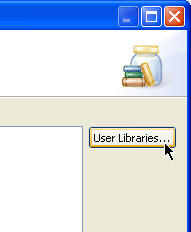
In the next window click the User libraries ... button
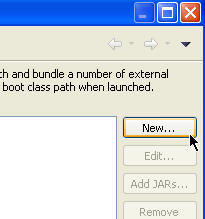
In the next click the New ... button.
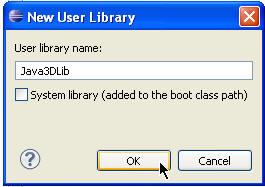
In the window that pops up give the new library a name. I use
the name Java3DLib. Then click the OK button.
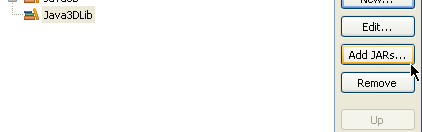
Select the library you just created and then click the Add
JARs ... button.
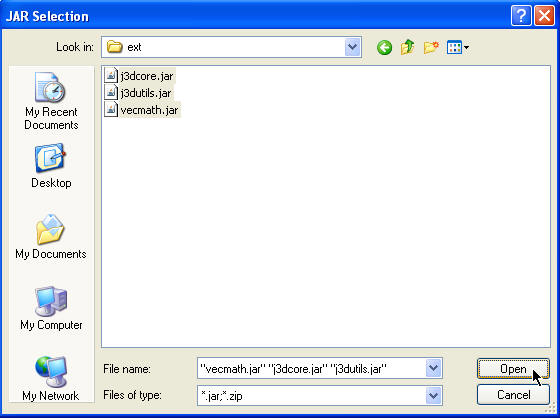
In the file selector that pops up navigate to the folder where
you installed Java3D in step 2. (On my machine the path to the jar files for
Java3D is Java3D -> 1.5.2 -> lib -> ext ->) Select all three jar files
(j3dcore.jar, j3dutils.jar, and vecmath.jar). After selection all three jar
files click the Open button
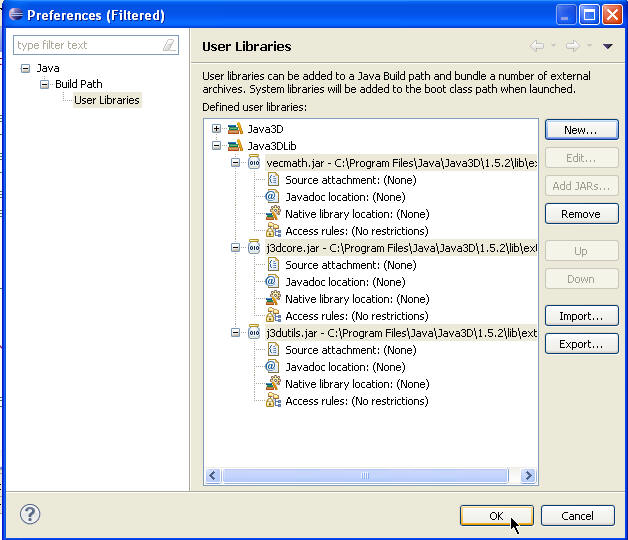
After adding the jars click the Okay button in the
preferences window.
In the window that pops up click the Finish button.

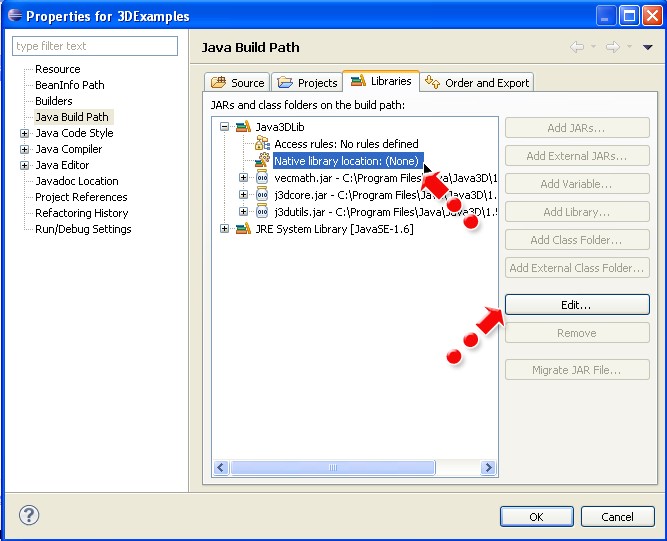
Back in the Build Path window select the Java3DLib you just
added, expand it, and select the Native Library Location property. Then
click the edit button.
In the window that pops up click the External Folder
button.
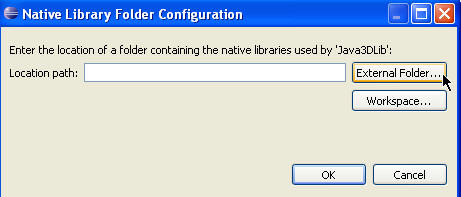
In the window that pops up, browse to the bin folder in
your Java3D folder. (On my machine this was at Java3D -> 1.5.2 -> bin) Select
the folder then click Okay.
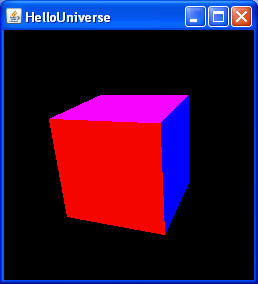
Close the preferences window. HelloUniverse should now compile
without any syntax errors. When you run the program you should see a spinning
colored cube.
You can download more example programs for Java3D here. (download the zip
file, unzip it, and then you can add classes / programs with examples to
Eclipse)
You
can access the documentation for the Java3D classes here.
You can download the documentation to install or your own machine here.